

WARDOGS First Match & Persistent Cash
Control Zone reading, $10,000 spending, team jobs, and one-variable recovery
WARDOGS First Match & Persistent Cash
Before buying a large setup, read the live Control Zone and name the team job that is missing. Use the starting $10,000 for one role-aligned test, earn through useful actions such as reviving, transporting, or controlling the objective, and preserve the same match context when retrying a failed life.
What this page is for
A bounded route for turning WARDOGS’s three-team objective and persistent-cash systems into a repeatable first-session test.
Player workflow
Use this page as a working handoff
Turn the first randomized Control Zone into one observable team contribution and one affordable purchase test.
- Zone location, score, and team presence
- One missing squad contribution
- Starting balance and per-life purchase
A short match ledger showing what changed, what failed first, and which single variable to retry.
Do not escalate spending or change the whole squad until the first handoff is identified.
Natural next handoff Use the ledger to choose a weapon test
Use the page in three moves
Query first, test second, recover cleanly
WARDOGS first-match decision board is a server-rendered reference with a light selector layered on top. Start from the named blocker, narrow once, and leave the full answer visible when a filter would hide useful context.
- 01Name the job
Start with the player problem, then use the search control zone, cash, team job, vehicle, building, or recovery control instead of scanning every row.
- 02Read one matching record
Use the wardogs first-match decision board result to compare the job, fields, confidence, and safe next action before changing another variable.
- 03Verify the live result
Run the smallest test that can disprove the current plan, keep the baseline you can reproduce, and record the exact condition that changes your next move.
Covered on this pageAccess · Control Zone · Team play · Persistent cash · Battlefield · Recovery
Best first queryEarly Access availability · September 10, 2026
If nothing matchesNo matching WARDOGS check
Read the match before buying into it
The first WARDOGS decision is where the Control Zone is and what your team lacks
A 100-player, three-team match can produce more noise than information. Make the opening useful by shrinking it to one objective read and one contribution.
When the match opens, resist the urge to judge the game by the first distant firefight. Find the randomized Control Zone, read the score, and identify which team has the clearest presence. The immediate question is not whether you can win a duel; it is whether your next movement improves the team’s chance to contest, hold, or reach the zone. A short route with a visible return point teaches more than a long solo rotation that ends before you know why it failed.
Give the squad one sentence that names the objective, the threat, and the next handoff. For example: the zone is ahead, the exposed road is the danger, and one player will open the approach while another stays close enough to keep presence. The exact call will change with the map and live battlefield, but the shape is stable: everyone should know what the team is trying to change and where the fallback sits.
If you are alone in the squad, choose the same kind of job for yourself. You can hold an edge of the zone, support a revive, transport a teammate, or alter a route with building or destruction. The guide does not rank those jobs because the correct choice depends on the current team gap. A vehicle is not automatically useful if it leaves the objective empty, and a fortification is not useful if the next move requires an exit it removes.
After the first meaningful action, stop and record what actually changed: team presence, access, survival, score, or cash. This turns a chaotic opening into a small baseline. If the action did not affect any of those outcomes, the next attempt should change the route or job before it changes the entire loadout.
- ObjectiveLocate the randomized Control Zone and read the current score before committing.
- ContributionChoose one missing job—presence, access, revive, transport, build, or engineering.
- EvidenceRecord whether the action changed presence, access, survival, score, or cash.
Use persistent cash as a learning budget
$10,000 should answer a question, not fund an untestable loadout
Cash persists between matches, but the items you buy are tied to the current life. That makes the first purchase a reversible experiment only when the job is explicit.
Start by writing the next life’s job in plain language: reach the zone through an exposed gap, keep one teammate alive during the approach, move the squad across a dangerous rotation, or protect a newly built route. Then buy only the smallest confirmed option that can test that job. The current public scope names loadout, gear, utility, weapons, and vehicles as per-life purchases, but it does not provide a complete public price sheet or payout formula, so a precise “best spend” would be false confidence.
Separate three numbers in your own notes: the balance before the match, the cost of the per-life purchase, and the balance after the match. The point is not to calculate a return rate from one chaotic round. It is to notice whether the purchase helped the job and whether the persistent reserve remains large enough for a second test. A purchase that looks powerful but cannot be connected to a repeatable objective has not earned an upgrade yet.
Teamplay can be part of the economy loop. Reviving teammates, transporting them, and controlling the objective are named cash-earning actions. Each one still needs a safety check: a revive may be exposed, transport may create a predictable route, and objective control may require a reserve or exit. The value is not just the cash prompt; it is whether the action also advances the team’s point race without turning the next life into another emergency.
If the balance is lower than expected, do not assume a refund, resale, or hidden penalty. Preserve the visible state and run a smaller job-aligned test. When Early Access exposes the live economy screen, stable costs and payouts can replace these boundaries with a stronger comparison. Until then, a reserve and a clear question are the safest form of preparation.
- Name the jobSpend only when the next life has a specific objective, route, support, or recovery question.
- Track the boundaryRecord before-balance, purchase, after-balance, and what the purchase visibly changed.
- Keep a reserveDo not spend the persistent balance chasing a result that the first test cannot explain.
Choose roles by the current gap
Infantry, Medics, Pilots, Builders, and Engineers are contribution prompts—not a permanent tier list
The published role examples are enough to organize a first session, but not enough to claim a complete class roster or universal balance ranking.
Choose the role lane after reading the team’s immediate problem. If the squad cannot stay in the zone, a presence or support job may matter more than another damage attempt. If the team can reach the objective but cannot cross the final approach, transport, piloting, building, or engineering may answer the gap. If a teammate is repeatedly lost during the same rotation, a revive or regroup job becomes the test. This keeps the role choice attached to a result the team can observe.
Keep the label separate from the exact live kit. “Medic” tells you the contribution to investigate; it does not tell you the final ability, cost, range, revive timing, or balance. The same is true of a Pilot or Engineer. Use the current role and loadout screen as the authority, and record one action under one objective before changing the whole composition.
In a group, assign ownership temporarily. One player watches the zone and score, one opens or protects the approach, one owns support or revive, and one handles transport or battlefield change if the route needs it. These are communication jobs, not promises about locked classes. When the zone moves or the team loses a life, reassign the missing job rather than defending the original plan out of habit.
A good first-session record can be short: role lane, zone position, purchase, first action, visible result, and next test. That record is more useful than saying a role is “strong” because it survived one fight. It also gives a future database a clean boundary: only stable names, fields, and repeatable relationships should be promoted beyond this focused guide.
- Gap firstChoose the squad problem before choosing a role label.
- Kit secondUse the live role and loadout screen to verify what the label actually does.
- Reassign cleanlyWhen the zone or route changes, move ownership to the job the team now lacks.
Recover from the first broken handoff
A lost life is useful only if the retry keeps the match readable
WARDOGS combines zone position, team composition, purchases, vehicles, construction, destruction, and communication. Preserve those conditions long enough to learn which one broke.
Name the first break, not the final outcome. “We lost” is too broad; “the zone was empty after the transport rotated,” “the revive was called without cover,” or “the purchase never reached the route it was meant to solve” gives the next life a real target. Keep the zone, score, squad context, job, and balance visible in your notes so a successful retry can be compared with the failure.
Then change one dependency. If the break was route access, test a different approach or a small battlefield change while keeping the objective and role steady. If it was support, keep the same route and change the revive or regroup owner. If it was spending, keep the job but buy a smaller option. If the issue was performance or online access, return to the same PC and connection baseline before calling a combat plan weak.
The randomized zone does not mean every comparison is impossible. It means the comparison must be framed around the same kind of task: contest the nearest zone edge, escort a teammate through an exposed lane, or recover after a lost life with one visible landmark. Do not compare the raw result of two different zone locations as if they were the same encounter. Compare the decision rule and the handoff it was meant to improve.
When a result cannot be reproduced, keep it marked as a live check. Early Access may change the role screen, economy, vehicle rules, or battlefield behavior. The safe next step is to record the current build and return to the smallest comparable test—not to fill the missing detail with a map, class, or damage table that the evidence does not support.
- NameWrite the first broken information, route, purchase, support, or survival handoff.
- HoldKeep zone type, job, squad context, and baseline stable for the retry.
- Change oneAlter one dependency, then record whether the next action became safer or clearer.
Visual reference
See the game context before making the lookup
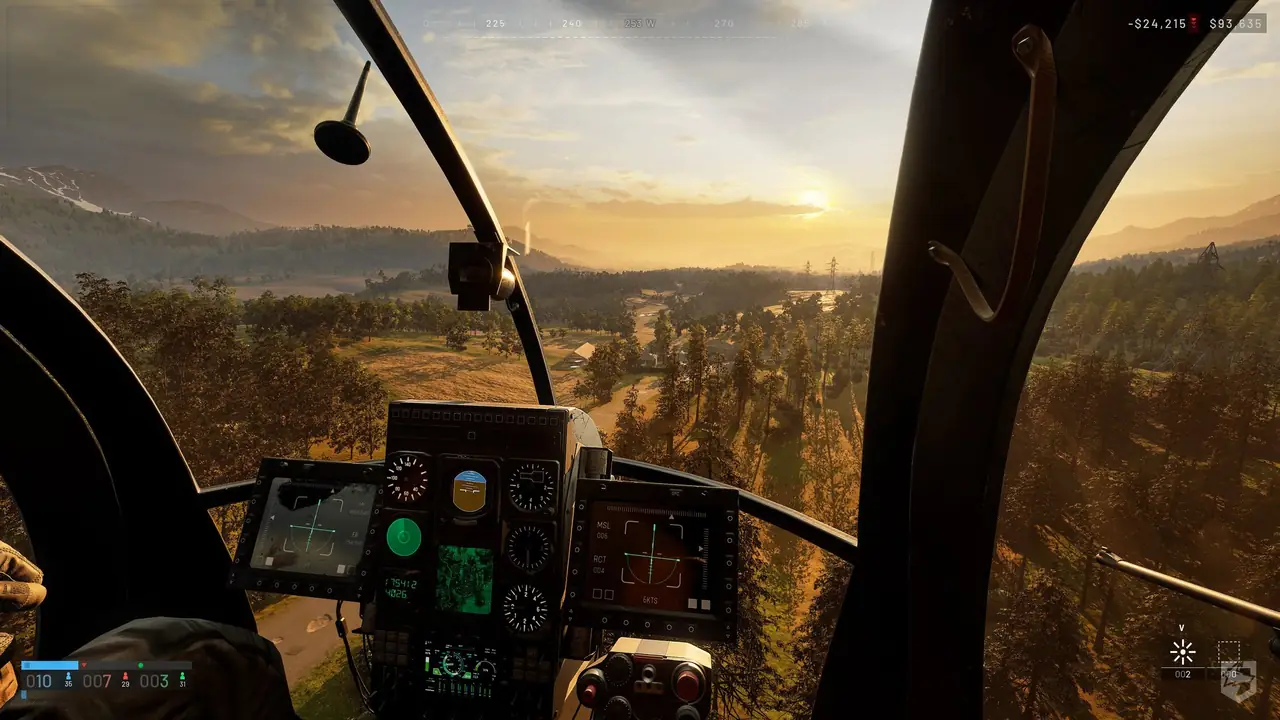
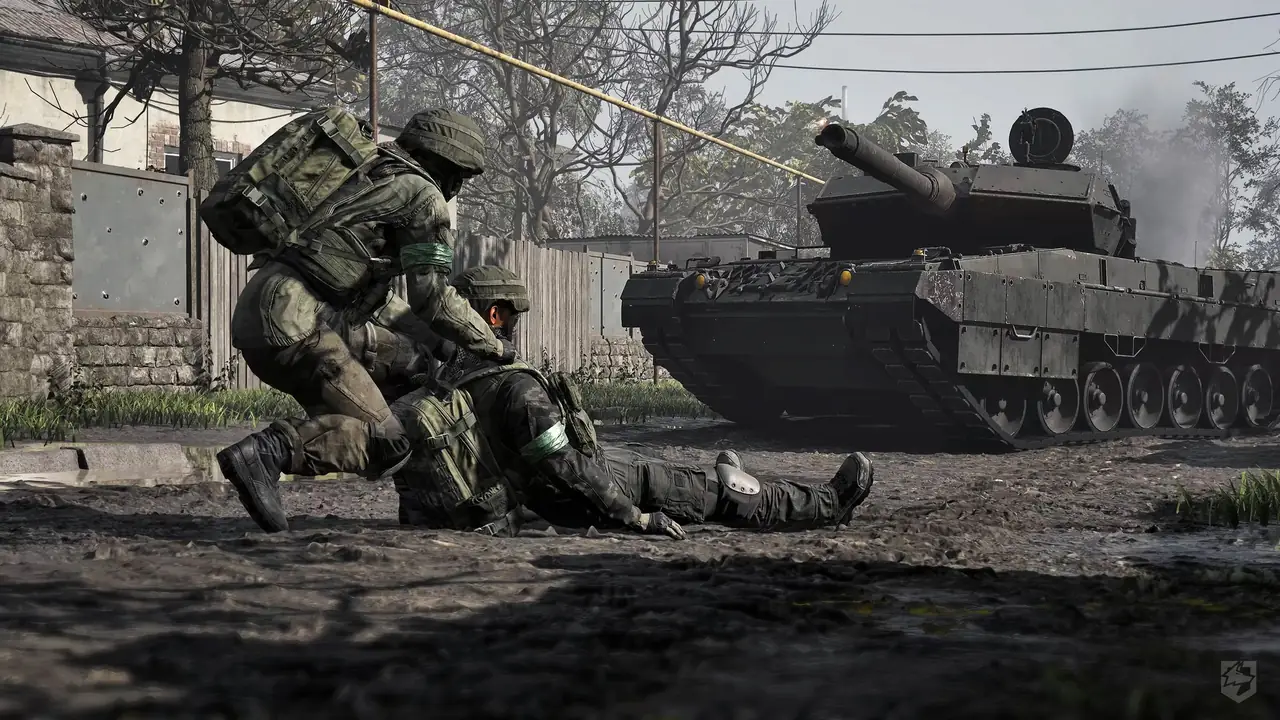
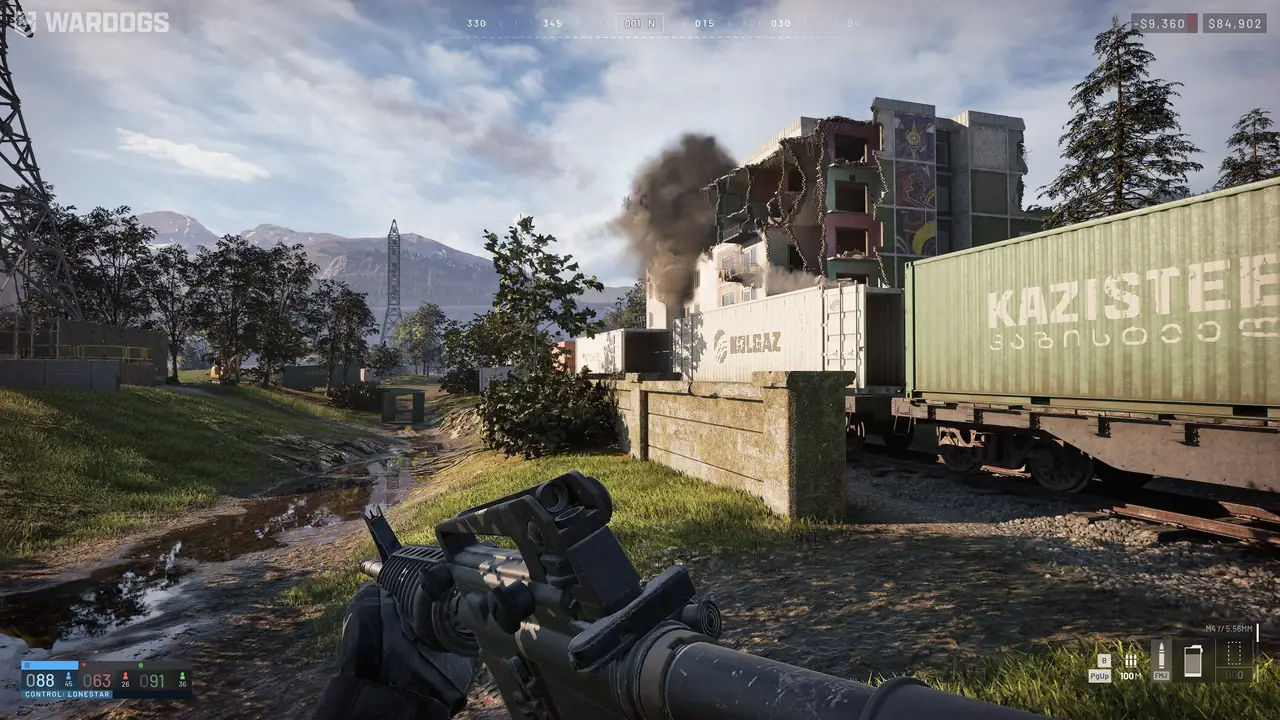
These local game scenes establish the situation this page addresses. They support orientation only; the actionable answer remains in the text, fields, and recovery route below.
Access, match, cash, roles, and recovery
Use one job-aligned test
First team to 100 points wins
Verify weapons, vehicles, maps, and prices in Early Access
Run one comparable opening
Zone read → contribution → purchase → result → one-variable retry
This sequence creates a useful baseline even when the zone, squad, and battlefield are changing.
- 1Freeze the baseline
Note platform, client state, party context, starting balance, and the role job you want to test.
- 2Read the live objective
Locate the Control Zone, score, team presence, nearest route, and one landmark that can anchor a regroup.
- 3Choose one contribution
Stay in the zone, open access, revive, transport, pilot, build, or engineer according to the current gap.
- 4Buy for one life
Spend only on the next named job and record the balance separately from the per-life purchase.
- 5Keep the first result
Write what changed and where the handoff broke before changing a second variable.
First-match decision board
WARDOGS first-match decision board
Before buying a large setup, read the live Control Zone and name the team job that is missing. Use the starting $10,000 for one role-aligned test, earn through useful actions such as reviving, transporting, or controlling the objective, and preserve the same match context when retrying a failed life.
18 matches WARDOGS first-match decision board
Access check · Access
Early Access availability · September 10, 2026
The official Steam listing places WARDOGS in Early Access from September 10, 2026.
- Released
- September 10, 2026
- Status
- Early Access
- Next check
- Live listing, entitlement, and client
Player job
Decide whether the current PC session can start now.
Use now
Verify the live listing, account entitlement, installed build, and update state before joining a match.
Safe next action
Keep region, account, platform, and client state visible in the same check.
Risk
A published date does not guarantee identical regional access, server health, or matchmaking.
Platform check · Access
Windows PC and online route
The current public scope lists WARDOGS for Windows PC online multiplayer.
- Platform
- Windows PC
- Format
- Online multiplayer
- Verify
- Account, update, connection
Player job
Confirm the planned device and whether the group can enter the same session.
Use now
Check the Windows install, account access, update state, and online connection before diagnosing match behavior.
Safe next action
Reach the match-entry screen with the party handoff intact before changing gameplay plans.
Risk
Platform availability does not establish crossplay, matchmaking, or final server behavior.
PC check · Access
PC requirement baseline
The store requirement baseline lists Windows 10, 16 GB RAM, a GTX 1660 or RX 590 minimum, and 50 GB storage.
- Minimum OS
- Windows 10
- Minimum memory
- 16 GB RAM
- Minimum graphics
- GTX 1660 / RX 590
- Storage
- 50 GB
Player job
Decide whether the machine is ready for an Early Access install.
Use now
Compare the machine with the current minimum or recommended listing and leave storage headroom for updates.
Safe next action
Use an SSD and close competing loads before judging a match result as a gameplay problem.
Risk
The playable build, drivers, resolution, and settings can change real performance.
Match system · Control Zone
Randomized Control Zone
Each match uses a randomized Control Zone that gives the three-team battle its immediate focus.
- Match system
- Randomized Control Zone
- First read
- Zone location and team state
- Safe anchor
- Visible landmark or squad route
Player job
Find the live point of conflict before choosing a route or purchase.
Use now
Read the zone location, team presence, and nearest usable approach before chasing a separate fight.
Safe next action
Use one visible landmark or squad member as the return reference while the battlefield changes.
Risk
A familiar route can become unsafe when the zone and destruction state move the pressure.
Win-condition check · Control Zone
Three-team point race to 100
The team with the most players in the Control Zone earns points; the first team to 100 points wins.
- Teams
- 3
- Win signal
- First team to 100 points
- Scoring cue
- Most players in the zone earn points
Player job
Understand why presence can matter more than an isolated elimination.
Use now
Move with enough support to contest or hold the zone, then recheck the score and next approach.
Safe next action
Call the zone and team state before committing to a long flank.
Risk
The exact pace, scoring display, and comeback behavior should be confirmed in the live client.
Contribution check · Team play
Keep one useful player in the zone
The objective rewards team presence, so the best first action may be holding the zone or opening access for the squad.
- Team job
- Objective presence and access
- First call
- Who owns the zone?
- Test
- Presence, approach, or recovery
Player job
Choose the contribution that keeps the team from losing the immediate objective.
Use now
Name one owner for zone presence and one player for the approach or recovery lane.
Safe next action
Do not leave the objective empty just to chase a distant fight unless the team has called the trade.
Risk
A kill-focused plan can lose the point race when it abandons the zone.
Economy check · Persistent cash
Starting balance · $10,000
Every player starts with $10,000 in the persistent cash system.
- Starting cash
- $10,000
- Persistence
- Between matches
- Use
- One job-aligned test
Player job
Set a first-life spending boundary without turning the opening into a shopping test.
Use now
Choose one purchase that serves the named team job and keep the rest available for the next life.
Safe next action
Treat the balance as a test budget until the first result is readable.
Risk
The current public evidence does not provide a complete price or payout table.
Economy rule · Persistent cash
Cash persists between matches
The current design states that cash persists between matches, even though equipment is bought per life.
- Persistence
- Between matches
- Per-life layer
- Loadout, gear, utility, weapons, vehicles
- Record
- Balance before and after
Player job
Protect the resource that remains useful after a match ends.
Use now
Record the balance before and after a session so a purchase decision is separate from match noise.
Safe next action
Spend upward only when the current purchase has answered a specific blocker.
Risk
The final economy screen and any loss rules require a live-client check.
Spending check · Persistent cash
Buy equipment for the next life
Loadout, gear, utility, weapons, and vehicles are described as purchases made per life.
- Purchased per life
- Loadout · gear · utility · weapons · vehicles
- Decision
- Named job before spend
- Next
- Comparable retry
Player job
Make the next purchase answer the next attempt instead of a vague power goal.
Use now
Buy the smallest confirmed option that supports your objective, transport, support, or route test.
Safe next action
Keep the previous job and match context visible when comparing a new purchase.
Risk
A larger purchase may be harder to evaluate if the zone, squad, and route all change together.
Teamplay economy · Team play
Revive as a teamplay cash lane
Reviving teammates is named as one way to earn cash.
- Named action
- Revive teammates
- First question
- Can the squad protect the revive?
- Unknown
- Exact payout and timing
Player job
Turn a recovery action into useful team value when the route is safe enough.
Use now
Revive when the squad can protect the interaction and the objective is not being abandoned without a call.
Safe next action
Check the zone and enemy pressure before committing to a revive.
Risk
A cash-earning action still has a route and survival cost; no payout amount is confirmed.
Teamplay economy · Team play
Transport teammates as a cash lane
Transporting teammates is named as one way to earn cash and contributes to combined-arms movement.
- Named action
- Transport teammates
- Team job
- Access and regroup
- Unknown
- Vehicle prices and rules
Player job
Use a vehicle or route to solve access, regroup, or objective pressure.
Use now
Transport the players who need the route and keep a return or dismount point in mind.
Safe next action
Test a short known handoff before using a vehicle for a long exposed rotation.
Risk
Vehicle availability, cost, durability, and seat rules are not part of the current stable data.
Teamplay economy · Control Zone
Control the objective as a cash lane
Controlling the objective is named as one way to earn cash.
- Named action
- Control the objective
- Connects
- Points and cash
- Unknown
- Payout and timing
Player job
Connect cash earning to the same zone work that wins points.
Use now
Choose a defensible presence that advances the score while keeping an exit or reinforcement route.
Safe next action
Do not convert every zone contest into a purchase plan before confirming the immediate team state.
Risk
The current sources do not establish payout values, capture timing, or a universal hold duration.
Role check · Team play
Choose a missing team job
Official examples include Infantry, Medics, Pilots, Builders, and Engineers.
- Examples
- Infantry · Medics · Pilots · Builders · Engineers
- Choose by
- Current squad gap
- Verify
- Live role and loadout screens
Player job
Select a contribution lane without treating examples as a complete class roster.
Use now
Choose the job the current squad lacks: presence, revive, transport, fortification, repair, or route access.
Safe next action
Hold one role job steady for a comparable test before swapping the whole plan.
Risk
A role label does not establish locked classes, exact abilities, or a balance ranking.
Battlefield choice · Battlefield
Build or break the approach
Building and destruction can affect the battlefield and change how teams reach the zone.
- Battlefield
- Building and destruction
- First question
- Cover or access?
- Safe move
- One route change with a fallback
Player job
Decide whether the next problem is missing cover, blocked access, or too much enemy shelter.
Use now
Change one route feature that serves the current objective, then check whether the squad can use the new path.
Safe next action
Keep a fallback route or landmark before removing the only readable approach.
Risk
A destroyed route can help the push and harm the retreat; exact building rules remain a live check.
Adaptation check · Battlefield
Recheck the zone after a battlefield change
A randomized zone and destructible setting mean a useful route can change during the match.
- Recheck
- Zone · score · cover · squad position
- Trigger
- Zone or battlefield changes
- Next
- Short route call
Player job
Keep the team’s next move tied to the current objective rather than yesterday’s route.
Use now
After a build, destruction, vehicle move, or lost life, re-read zone, score, cover, and squad position.
Safe next action
Use the last visible landmark and make the next call short and specific.
Risk
A good action in the previous zone can be wrong after the objective or approach changes.
Recovery check · Recovery
Lost life · preserve the match context
A lost life combines the current zone, score, purchase, route, and team context; it should not erase the information from the attempt.
- Record
- First failed handoff
- Keep
- Zone, job, squad, match state
- Change
- One dependency
Player job
Identify the first break before buying a completely different setup.
Use now
Write the first failed handoff—zone read, route, communication, purchase, support, or survival—then repeat one lane.
Safe next action
Keep the same target and job long enough to learn whether the change fixed the break.
Risk
Changing role, loadout, route, and objective together creates another unreadable result.
Recovery check · Recovery
Overspent cash · return to a known job
A persistent balance makes an expensive but unhelpful purchase a resource problem for the next match.
- First move
- Smaller job-aligned test
- Protect
- Remaining persistent balance
- Unknown
- Refund and resale behavior
Player job
Recover spending discipline without assuming a hidden refund or payout rule.
Use now
Use the remaining balance on a smaller job-aligned test and record whether teamplay earns a clearer return.
Safe next action
Do not chase the previous purchase by spending the rest of the balance.
Risk
The current scope does not confirm refunds, resale, or exact economy recovery values.
Current check · Updates
Community and launch handoff
The official community and playtest routes are the current handoff when a live detail is not yet represented in the bounded guide.
- Bring
- Platform · build · zone · balance · failure
- Use for
- Current launch discussion
- Scope
- Handoff, not a complete database
Player job
Find a current answer without confusing an old clip with the current build.
Use now
Bring the platform, client state, zone, role job, balance, and first failure to the current community discussion.
Safe next action
Ask one narrow question and preserve the last confirmed state.
Risk
Community reports can describe different test builds and should be treated as reported until reproduced.
No matching WARDOGS check
Clear the search or player-job filter to return to the bounded access, Control Zone, cash, team, battlefield, and recovery records.
When the answer does not fit
When the first life does not teach you enough
Keep the match state narrow. A chaotic result is still useful when the retry changes only the lane that first broke.
- 1Name the first break
Record whether the failure began with access, zone information, route, communication, spending, support, or survival.
- 2Restore the readable state
Use the same kind of objective, team job, PC baseline, and balance note where the live match allows a comparison.
- 3Change one dependency
Alter the route, purchase, handoff, role owner, or battlefield action that matches the first break.
- 4Recheck the outcome
Compare presence, access, survival, score, and cash—not only the final win or loss.
- 5Leave unknowns marked
If the result cannot be reproduced, keep the role, map, cost, payout, or balance detail as a live-client check.
Decision table
Choose the smallest next test
Choose the row that matches the failure in front of you; the action is a bounded next experiment, not a hidden-stat guarantee.
| Situation | Action | Why |
|---|---|---|
| The team is losing the Control Zone | Assign one player to presence and one to the safest approach. | The score depends on team presence; a distant solo fight may not change the objective. |
| The approach is exposed | Test one transport, cover, build, or destruction change. | The battlefield can alter access, but a fallback keeps the new route recoverable. |
| A teammate is down near the route | Call the revive only when the squad can protect it. | Revive is a named teamplay cash lane, but it still has exposure and timing risk. |
| You want to spend the starting balance | Buy one job-aligned option and keep the rest visible. | Persistent cash remains useful between matches while the purchase applies to one life. |
| The vehicle move did not help | Repeat a shorter transport or dismount handoff. | A short comparable route can separate vehicle access from zone or communication failure. |
| The life was lost | Change only the first broken dependency. | Holding the zone, job, squad, and balance context protects the value of the retry. |
Share this guide
Send the answer when another player hits the same blocker.
Share the current WARDOGS route, or copy the link for Discord and group chat.
Player questions
First Match & Persistent Cash FAQ
Use the current game panel before spending rare resources on a value that can change.
What should I do in my first WARDOGS match?
Read the Control Zone, stay with the squad long enough to understand the route, and choose one contribution that protects presence, access, support, or recovery.
Should I spend all $10,000 immediately?
No. Treat the starting cash as a test budget. Buy only the equipment or vehicle that serves the next named job, then compare the result before escalating.
How can I earn cash in WARDOGS?
The current feature description identifies reviving, transporting teammates, and controlling the objective as cash-earning actions. It does not establish a complete payout formula.
Are Infantry, Medics, Pilots, Builders, and Engineers fixed classes?
They are official role examples and contribution lanes. A complete class roster, locked loadout, and balance ranking remain live-client checks.
How should I recover after losing a life?
Keep the same zone, squad context, job, and first failed action visible. Change one purchase, route, communication, support, or battlefield variable on the next attempt.