

Pick quarry, farm, alchemy, regular workbench, or an available underground machine.
Graveyard Keeper 2 Zombie Worker Automation

Find the first broken station, tool, input, worker, or output link
Graveyard Keeper 2 Zombie Worker Automation Troubleshooting
Pick one station and job, read its live tool and input requirements, confirm the worker role and supplier/output route, then observe one complete cycle. Change only the first failed link; specialization and red-skull potential are not numeric efficiency rankings.
Use this page when
Find whether the failure is eligibility, tools, input, assignment, route, or output before redesigning the Factory.
Workflow: Factory troubleshooting · one worker and one station cycle
Open the action tableUse the live station display for tools, recipe, and input state.
One failed handoff identified and one same-baseline retest with only that dependency changed.
Choose the blocker
What is stopping this attempt?
Find the row that matches the situation in front of you. Do the action, check the live result, then follow the page's recovery route only if the same blocker remains.
| When this happens | Do this now | Check before moving on | Do not assume |
|---|---|---|---|
| A quarry or farm worker stays idle | Check its displayed job/tool requirement and destination | The same worker is assigned to the intended resource lane | Replacing the whole roster before verifying station eligibility. |
| Alchemy or a workbench will not start | Verify the station family and every displayed input | Recipe, tools, and output location | Assuming a worker that works at another bench proves this one is ready. |
| An underground machine does not complete a cycle | Check availability, requirement, assignment, input, then output | Keep the prior manual route intact | Assuming a preview establishes throughput or unlock order. |
| A high-potential worker is available | Use it as one candidate in a controlled test | Same station and inputs; one worker changed | Converting red skulls or specialization into a numeric ranking. |
Need recovery?Jump to the failure route
Worker-Cycle Diagnostics
Worker-zombie cycle diagnostics
Search a named blocker or topic. The full record opens only when you need its fields, safe action, and risk.
7 matches Worker-zombie cycle diagnostics
Role check · resource
Separate a worker from a hostile zombie
Worker zombies and hostile bad zombies belong to different jobs; confirm the worker role before debugging a production station.
- First distinction
- Worker role vs. hostile bad zombie
- This guide
- Production workers only
Player job
Make sure the selected zombie is eligible for the work lane you are testing.
Use now
Check the live worker marker and the station assignment before changing a tool, recipe, or layout.
Safe next action
Keep hostile threats on a combat route; this page diagnoses production workers only.
Risk
Treating a threat as a worker can make every later station check irrelevant.
Resource lane · resource
For a quarry or farm, verify job, tool, and destination
Quarrying and farming are named worker-zombie lanes; one completed route has to connect the job to its required tool/input and output destination.
- Cycle
- Job → requirement → worker → destination
- Change first
- The earliest failed link only
Player job
Find whether the worker can start and finish the resource cycle.
Use now
Read the station’s current job and tool requirement, confirm its input if shown, and inspect where the resulting resource should land.
Safe next action
Hold the assigned worker and station fixed while checking the destination or storage state.
Risk
An idle resource worker can be blocked upstream or downstream of the assignment itself.
Station family · bench
Keep alchemy and regular workbenches as separate tests
Alchemy and standard workbenches are separate named work areas; a worker result in one does not establish the route in the other.
- Station families
- Alchemy · regular workbench
- Compare
- Same job and inputs per retest
Player job
Diagnose one station family without rewriting every worker assignment.
Use now
Check the selected station’s recipe, required tools, and full input list, then verify the assigned worker is attached to that same job.
Safe next action
Test either the alchemy station or the regular workbench first, not both in one retest.
Risk
A missing ingredient or a different station family can look like a specialization failure.
Machine lane · machine
Debug an underground machine from access to output
Underground semi-automatic machines add a different work handoff from regular benches, so their own access, assignment, supply, and result must be checked.
- Check order
- Available → requirement → assignment → input → output
- Keep
- Manual fallback until the cycle works
Player job
Find whether the machine or its worker/input route is stopping the cycle.
Use now
Confirm the machine is available in the current save, read its displayed job/tool needs, check its supplied input, then watch one output cycle.
Safe next action
Keep the existing manual route intact while the machine is being tested.
Risk
A machine description does not prove unlock order, throughput, recipe, or automatic supplier range.
Worker comparison · handoff
Test specialization without replacing the whole crew
Specializations and individual skill progression make worker choice relevant, but the current evidence does not provide a universal efficiency ranking.
- Keep fixed
- Station · tool · input · destination
- Compare
- One worker over one full cycle
Player job
Tell whether one worker matches one repeated job better in your current setup.
Use now
Choose one specialist for the blocked station, keep recipe, tools, route, and destination constant, and observe one complete cycle.
Safe next action
Record the actual station result for that worker; repeat under the same setup before changing the roster.
Risk
Changing worker and station conditions together turns a comparison into an anecdote.
Evidence boundary · handoff
Treat red-skull potential as a lead, not an output stat
Higher red-skull corruption is described as development potential, but no numeric threshold or production formula is established for a station choice.
- Signal
- Potential only
- Result
- Observed station cycle
Player job
Choose what to test without claiming a hidden efficiency number.
Use now
Use the live skill and specialization state to select a candidate, then judge it by the same observable cycle as any other worker.
Safe next action
Keep potential separate from measured output and from the worker’s intended job.
Risk
Turning skull color into a fixed speed or quality ranking would overstate the evidence.
Cycle recovery · handoff
Recover by locating the first missing handoff
A cycle can fail at eligibility, tools, input supply, assignment, route, or output; the first failure determines the useful correction.
- Diagnosis
- First unconfirmed link
- Retest
- Same job · one change
Player job
Restore a stalled setup without changing multiple Factory dependencies.
Use now
Walk the same job in order from station requirement to tool/input, assigned worker, supplier route, and output destination; stop at the first item the game does not confirm.
Safe next action
Change only that link, then observe the same station cycle again.
Risk
Moving the worker, rebuilding the station, and rerouting storage at once hides which change mattered.
No worker-cycle check matches that search
Search the exact station or missing input, then check its live requirement before moving workers or rebuilding the Factory.
Workflow details
What to bring into the next attempt
Open the contract only when you need the exact inputs, stop signal, or next handoff.
Show workflow inputs, stop condition, and handoff
- One station and intended job
- Visible requirement and item state
- Worker assignment plus supplier/output route
One failed handoff identified and one same-baseline retest with only that dependency changed.
Stop if the game exposes no observable requirement, cycle, or result to compare.
Natural next handoffTown Shop Supply Route
Debug the station, not the undead theme
A quarry, a workbench, and a semi-automatic machine do not share one failure path
The first useful diagnosis is station-specific: a named job must be eligible, supplied, staffed, and able to place its output.
Answer
Begin with the station the player expects to run. For quarrying or farming, read the displayed job/tool requirement and verify the destination for the gathered resource. For alchemy and regular workbenches, keep the station family visible and check the exact recipe inputs before changing the worker. For an underground machine, confirm it is available in this save, then check its own requirement, assignment, input, and output. These are not interchangeable lanes; success at one does not prove the others.
Reasoning and edge cases (2)
Next, verify the worker. Confirm the selected zombie is in a worker role, then match its specialization to the station job. Do not start by replacing every worker: preserve the same station and supply route so one cycle can show whether the candidate is suitable. Individual progression is a reason to revisit an assignment, not proof of a universal ranking.
Finish at the destination. If the station accepts its inputs but no resource appears where expected, inspect output placement or storage before tearing down the assignment. Keep the old manual route available until an underground machine completes a full cycle in your own save.
- Resource laneJob/tool → worker → output destination.
- Bench laneStation family → recipe inputs → worker → result.
- Machine laneAvailability → requirement → supply → output, with a fallback.
Use a controlled comparison
Specialization becomes useful only when the cycle is comparable
A worker label or skull signal can nominate a test; it cannot tell you what happened at the station.
Answer
For a meaningful comparison, hold the station, tools, recipe, input quantity, supplier route, and output destination still. Change only the worker. Observe one complete cycle and write down the result the game actually displays. If the result is not measurable or repeatable, stop there rather than inventing a speed, yield, or quality ranking.
Reasoning and edge cases (2)
Red-skull corruption is reported as development potential, but this page does not translate that signal into an efficiency formula. Keep three things separate in your notes: potential, worker specialization, and measured result. That distinction prevents a promising corpse from being mistaken for a proven production upgrade.
If the first failed link is a missing Town item or locked seller tier, move to Town Shop Supply Route. If the worker itself is not yet prepared, make that one-body decision in Corpse Handling first. Army combat and hostile threats are intentionally outside this Factory diagnosis.
- HoldStation, job, tools, input, route, destination.
- ChangeOne worker assignment.
- KeepAn observed output, not a guessed efficiency score.
Make the result observable
Do not call a cycle broken until its inputs and output can be seen
A useful retest starts from one station state the game exposes; an assumed timer or hidden throughput is not a diagnosis.
Answer
Before changing the worker, make the test legible: record the station and job, read the displayed tool and recipe requirements, check that the needed input is present, and identify where the result should appear. Confirm the worker is attached to that same job. If the output destination is full or unclear, resolve that observation first; an unseen result cannot tell you whether specialization changed anything.
Reasoning and edge cases (2)
Watch for a completion signal the current station actually provides—such as an updated job state or a visible output—and compare the same signal on the next attempt. This guide gives no universal production duration, queue size, or machine rate. If the interface does not expose a repeatable cycle, keep the prior manual route and stop short of ranking workers from a partial wait or a skull-color estimate.
Once one cycle is visible, change only its earliest failed dependency and observe the same endpoint again. A missing Town item belongs to the supply route; an unprepared body belongs to corpse triage; a confirmed input with no visible result belongs here only if the station exposes a checkable worker or output handoff. That boundary makes a negative test useful without turning it into an unsupported Factory-wide conclusion.
- BaselineStation, job, requirement, worker, and output location.
- ObserveUse a visible completion signal, not an assumed timer.
- StopKeep the manual fallback if no repeatable result is exposed.
Visual reference
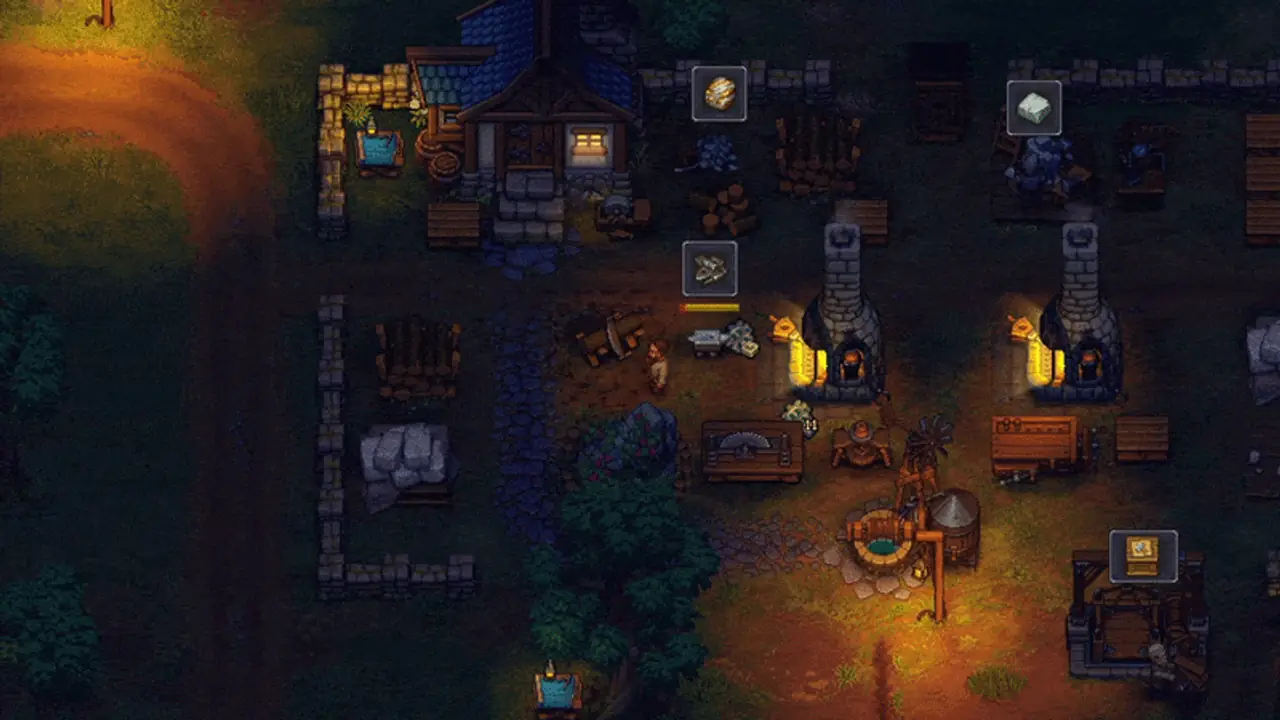
See the game context before making the lookup
These local game scenes establish the situation this page addresses. They support orientation only; the actionable answer remains in the text, fields, and recovery route below.

Check one destination
Do not merge the tests
Keep a manual fallback
Observe the actual cycle
Worker-cycle diagnosis
Station → requirement → worker → supply route → output
Follow one selected job end to end. The first unconfirmed link is the only one to change on the next attempt.
- 1Name one station and job
Pick quarry, farm, alchemy, regular workbench, or an available underground machine.
- 2Read its requirement
Use the live station display for tools, recipe, and input state.
- 3Confirm the assigned worker
Check role and specialization without replacing the rest of the crew.
- 4Trace supply and destination
Verify the supplier route and where a completed output should appear.
- 5Run one full cycle
Keep the setup fixed, observe the result, and change only the first failed link.
When the answer does not fit
When one full worker cycle still produces no result
Return to the first requirement the current game cannot confirm and fix only that link.
- 1Reopen the same station
Confirm the intended job and current station state did not change.
- 2Check tool and input state
Read the station’s requirement and trace missing goods back to a Town seller or craft route.
- 3Confirm worker and route
Check role, assignment, supplier, and output destination without replacing every worker.
- 4Retest the same cycle
Change only the failed dependency and compare the same output state.
Share this guide
Send the answer when another player hits the same blocker.
Share the current Graveyard Keeper 2 route, or copy the link for Discord and group chat.
Player questions
Zombie Worker Automation FAQ
Which jobs can worker zombies do?
Current system descriptions name quarrying, farming, alchemy, regular workbenches, and underground semi-automatic machines. Check the available jobs in your save.
Why is a worker zombie idle?
Check the selected station’s job/tool requirement, inputs, worker assignment, supplier route, and output destination in that order.
Does a red-skull worker produce faster?
No numeric efficiency rule is claimed. Treat red-skull potential as a reported lead and compare one worker on the same station cycle.
What should I change first?
Change the earliest failed link you can observe, then rerun the same job with all other dependencies unchanged.
Does this page cover the undead army?
No. Army equipment and encounter builds are a separate, currently deferred task; this route is only for production workers.