

Denshattack Controls & Tricks
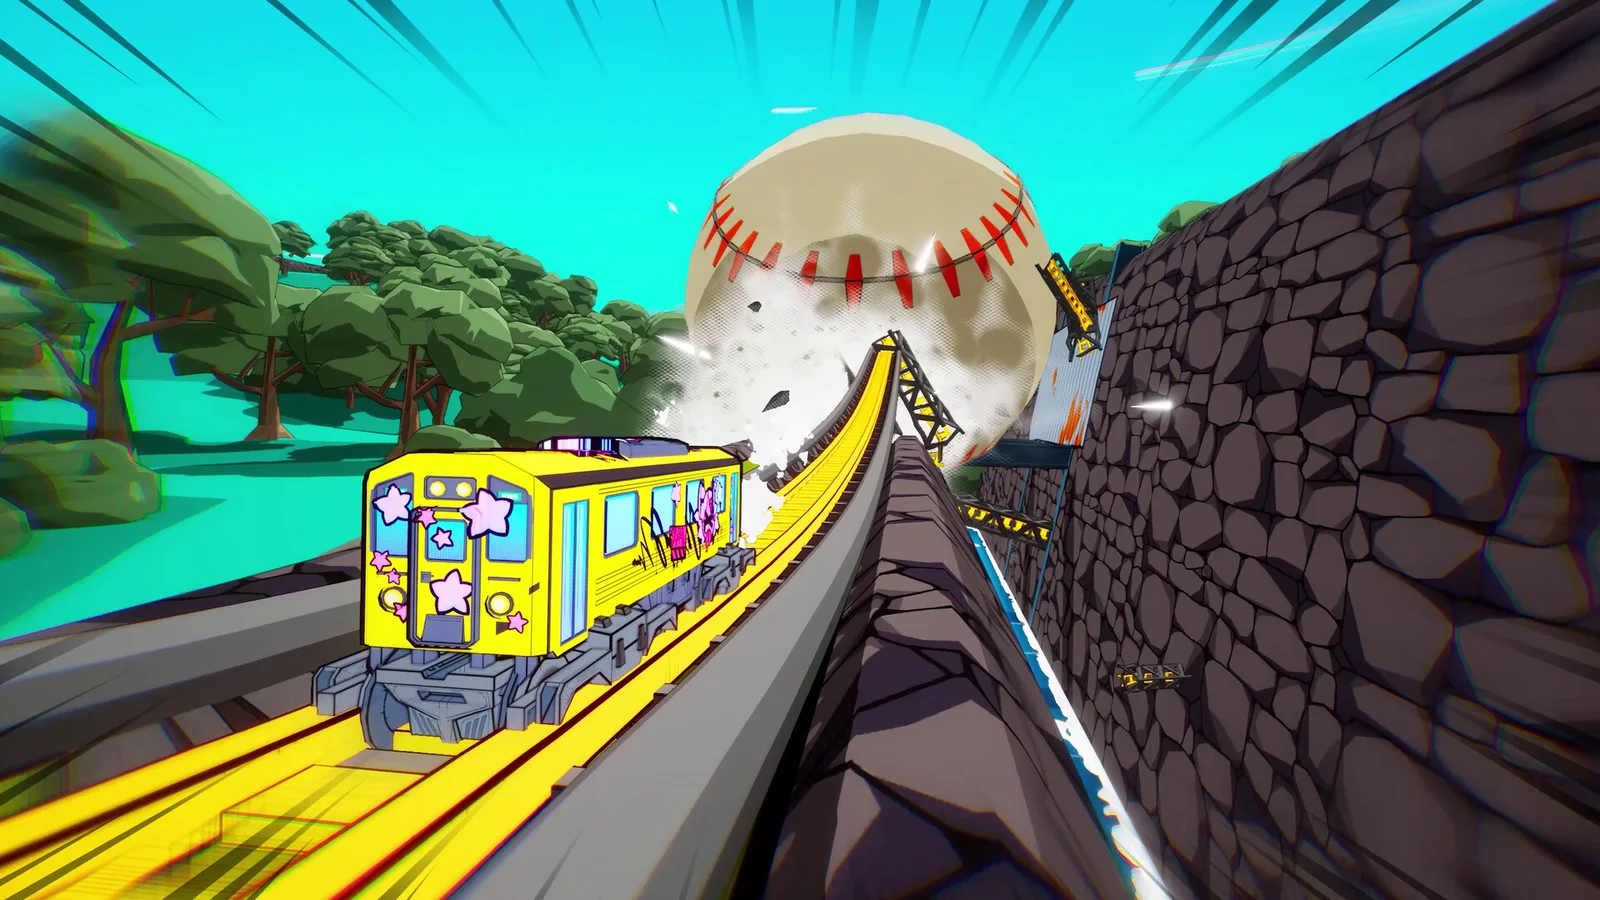
Controller layout, trick, landing, race, route, and boss recovery drills
Denshattack Controls, Tricks & Landing
Check the controller layout first, then read the objective, choose the landing or exit before the trick, isolate the first failed link, and repeat a short line three times before adding speed or style.
What this page is for
A focused controller and failure finder for learning Denshattack movement without pretending every level or boss has one universal route.
Use the page in three moves
Query first, test second, recover cleanly
Trick, combo, landing, race, and boss failure finder is a server-rendered reference with a light selector layered on top. Start from the named blocker, narrow once, and leave the full answer visible when a filter would hide useful context.
- 01Name the job
Start with the player problem, then use the search a failed trick, landing, grind, race, route, boss, or control problem control instead of scanning every row.
- 02Read one matching record
Use the trick, combo, landing, race, and boss failure finder result to compare the job, fields, confidence, and safe next action before changing another variable.
- 03Verify the live result
Run the smallest test that can disprove the current plan, keep the baseline you can reproduce, and record the exact condition that changes your next move.
Covered on this pageCombo · Score · Race · Boss · Route · Controls
Best first queryThe combo breaks on takeoff
If nothing matchesNo matching Denshattack drill
Diagnose the first broken link
A Denshattack reset is useful only when it leaves one question behind
The train can fail at takeoff, in the air, on the rail, at the exit, or after the landing. Those are different practice problems even when the screen shows the same reset.
Start by naming the objective before touching the controls. A score attempt needs a stable line that can be extended; a rival run needs a time-saving route; a boss section needs a survivable read of the phase; and a new region needs a scouting pass. If the objective is unnamed, every missed landing looks like a reason to change the whole build.
Then mark the earliest visible break, not the most dramatic one. If the train leaves the rail with no safe exit, the later crash is only a consequence. If the jump command never arrives, changing the trick direction will not teach you anything. Keep the camera, controller profile, entry speed, and route stable while checking that first link.
A good retest has one changed variable and one observable result: the train reaches the chosen landing, keeps momentum through the grind, clears the rival section faster, or survives long enough to read the boss opening. When the result is unclear, shorten the line again instead of adding more style. The finder rows below are deliberately written as checks and practice actions rather than universal frame claims.
- Objective firstScore, race, boss, route, and controls need different success conditions.
- Earliest breakFix the first lost input or exit before reacting to the final crash.
- One variableHold the route and setup steady so the next result can be understood.
Build the line in layers
Bank the route before you spend speed on a bigger combo
The safest progression is a short line with a visible exit, followed by one deliberate extension at a time.
Choose the landing before the trick. A rail, track segment, or open surface that remains visible gives the jump a job and tells you whether the next input is helping or merely adding risk. Run the smallest approach that reaches that exit, then repeat it until the movement is boring enough to serve as a baseline.
Once the baseline works, add one link: one rotation, one grind, one transition, or one controlled speed input. Do not change the landing and the approach at the same time. If the extension breaks, remove it and confirm the old line still works. That comparison tells you whether the new move is the problem or whether the route was already unstable.
Region changes deserve the same discipline. City lines ask for early lane and rail reads; countryside lines reward preserving momentum across longer approaches; terrain challenges introduce a new visibility or landing rule; rival routes separate speed from score; and boss routes punish style that hides the phase cue. The route record is a question to scout, not a promise that every level has one solved path.
- Exit firstName where the train must land before adding rotation or a second trick.
- Extend onceAdd one link, then compare it with the banked short line.
- Scout regionsRead the local movement rule before importing a successful line from another route.
Choose the right practice mode
Race, score, and boss retries should not share the same risk budget
The same trick can be correct for one objective and actively harmful for another.
For a race, remove optional style until the slow section is obvious. A clean line that reaches the next checkpoint gives you a timing baseline; only then should a boost, grind, or trick return if it saves time without damaging the exit. A higher score that arrives late is not a race solution, and a flashy shortcut that cannot be repeated is not a reliable route.
For a score objective, protect the completed portion of the line. Keep the takeoff and landing that already work, then add the smallest multiplier or rail extension that can be measured. If the score improves but the landing fails, the next move is to shorten the combo and bank the route again—not to add another input to compensate.
For a boss, survival is the first data point. Use a low-risk movement line to expose the phase cue, keep an exit visible, and only spend speed or style after the opening can be recognized. If a controller input feels inconsistent, switch to the controls group and test one binding in open space before diagnosing the boss or route. This keeps setup faults from becoming false combat advice.
- RaceFind the slow section before optimizing style or score.
- ScoreKeep the successful base line and add one measurable link.
- BossRead the phase safely before committing to a damage or style route.
8 failure routes + 6 controls + 5 route reads + 6 post-release checks
Keep the successful baseline visible
Extend only after the route repeats
Practice order
Build the combo from a readable exit, not from the biggest trick
Use the failed objective to choose one drill, repeat it, then restore speed or style after the route survives.
- 1Read the objective
Decide whether the stage is asking for a clean route, speed, score, a rival win, or a boss phase.
- 2Choose the exit first
Name the rail, track, landing, or survival window that keeps the objective alive.
- 3Practice one broken link
Repeat only the takeoff, landing, grind entry, speed section, phase, or control setup that failed.
- 4Bank the stable route
Land the short line three times before adding another trick, multiplier, or risky transition.
Combo & Controls Finder
Trick, combo, landing, race, and boss failure finder
Check the controller layout first, then read the objective, choose the landing or exit before the trick, isolate the first failed link, and repeat a short line three times before adding speed or style.
25 matches Trick, combo, landing, race, and boss failure finder
Gameplay fix · Combo
The combo breaks on takeoff
Check approach speed and jump timing, then isolate one repeatable drill.
- Objective
- Combo
- Failure point
- Takeoff
- Check
- Approach speed and jump timing
- Practice
- Repeat the ollie or first trick without the rest of the line.
- Bank rule
- Do not add rotation until the entry works three times.
Player job
Recover the combo route without rebuilding every trick or input at once.
Use now
Repeat the ollie or first trick without the rest of the line.
Safe next action
Do not add rotation until the entry works three times.
Risk
Repeating the full line hides whether speed, jump timing, or the first trick is the real failure.
Gameplay fix · Combo
The train misses the landing
Check exit target and camera angle, then isolate one repeatable drill.
- Objective
- Combo
- Failure point
- Landing
- Check
- Exit target and camera angle
- Practice
- Choose the rail or track segment before starting the trick.
- Bank rule
- A landed short combo beats a reset.
Player job
Recover the combo route without rebuilding every trick or input at once.
Use now
Choose the rail or track segment before starting the trick.
Safe next action
A landed short combo beats a reset.
Risk
Adding rotation before choosing the exit turns a readable landing into a blind reset.
Gameplay fix · Combo
A grind loses momentum
Check rail entry angle and the next exit, then isolate one repeatable drill.
- Objective
- Combo
- Failure point
- Grind
- Check
- Rail entry angle and the next exit
- Practice
- Enter the rail earlier and plan where the train leaves it.
- Bank rule
- Leave the rail while the route is still readable.
Player job
Recover the combo route without rebuilding every trick or input at once.
Use now
Enter the rail earlier and plan where the train leaves it.
Safe next action
Leave the rail while the route is still readable.
Risk
Staying on the rail too long can remove the next safe exit and the speed needed for the objective.
Gameplay fix · Score
The score is safe but too low
Check unused air time, rail length, or one missing link, then isolate one repeatable drill.
- Objective
- Score
- Failure point
- Scoring
- Check
- Unused air time, rail length, or one missing link
- Practice
- Add one kickflip, grind link, or clean transition.
- Bank rule
- Keep the successful base line unchanged.
Player job
Recover the score route without rebuilding every trick or input at once.
Use now
Add one kickflip, grind link, or clean transition.
Safe next action
Keep the successful base line unchanged.
Risk
Changing the entire successful line can lose the reliable base score without proving which extra link helped.
Gameplay fix · Race
A rival race keeps winning
Check where speed is lost rather than where style is lowest, then isolate one repeatable drill.
- Objective
- Race
- Failure point
- Speed
- Check
- Where speed is lost rather than where style is lowest
- Practice
- Run a clean route with minimal tricks to find the slow section.
- Bank rule
- Solve the race before rebuilding the score route.
Player job
Recover the race route without rebuilding every trick or input at once.
Use now
Run a clean route with minimal tricks to find the slow section.
Safe next action
Solve the race before rebuilding the score route.
Risk
A stylish route can keep losing when the actual time loss is one slow section or failed landing.
Gameplay fix · Boss
A boss phase collapses
Check the phase rule and survival window, then isolate one repeatable drill.
- Objective
- Boss
- Failure point
- Survival
- Check
- The phase rule and survival window
- Practice
- Use a low-risk movement line until the opening is clear.
- Bank rule
- Damage or style only after the mechanic is understood.
Player job
Recover the boss route without rebuilding every trick or input at once.
Use now
Use a low-risk movement line until the opening is clear.
Safe next action
Damage or style only after the mechanic is understood.
Risk
Chasing damage or style before reading the phase can spend the survival window without learning the mechanic.
Gameplay fix · Route
A new region feels unreadable
Check takeoff space, rail length, and obstacle rhythm, then isolate one repeatable drill.
- Objective
- Route
- Failure point
- Scouting
- Check
- Takeoff space, rail length, and obstacle rhythm
- Practice
- Make one low-score scouting pass through the new rule set.
- Bank rule
- Return for a score line after the route is known.
Player job
Recover the route route without rebuilding every trick or input at once.
Use now
Make one low-score scouting pass through the new rule set.
Safe next action
Return for a score line after the route is known.
Risk
A high-score first attempt gives too little attention to the new terrain, rail, visibility, or obstacle rule.
Gameplay fix · Controls
Controller inputs feel inconsistent
Check input device, sensitivity, and whether the game changed prompts, then isolate one repeatable drill.
- Objective
- Controls
- Failure point
- Setup
- Check
- Input device, sensitivity, and whether the game changed prompts
- Practice
- Use one controller profile and repeat the same short line.
- Bank rule
- Do not change input and trick timing in the same test.
Player job
Recover the controls route without rebuilding every trick or input at once.
Use now
Use one controller profile and repeat the same short line.
Safe next action
Do not change input and trick timing in the same test.
Risk
Changing the device setup and the trick timing together makes the successful variable impossible to identify.
Controller binding · Controls
Drift / brake input
Use the trigger that matches the current platform prompt before testing a speed or landing problem.
- Xbox
- LT
- PlayStation
- L2
- Switch 2
- ZL
- Use it for
- Drift entry, speed control, and braking before a landing
Player job
Confirm the drift or brake input without changing the route you are using as a baseline.
Use now
Hold the listed trigger on a short, low-risk line, then repeat the same entry with the trigger released.
Safe next action
Keep the controller profile and camera unchanged while checking the input.
Risk
A prompt mismatch can look like a timing failure when the game is receiving a different action.
Controller binding · Controls
Jump / ollie input
Check the jump input before diagnosing a takeoff or first-trick failure.
- Xbox
- RT
- PlayStation
- R2
- Switch 2
- ZR
- Use it for
- Jump, ollie, and takeoff setup
Player job
Separate a missed jump command from approach speed and trick timing.
Use now
Use the jump button once on a straight section, then repeat the same short approach before adding a trick.
Safe next action
Test the command in open track space so a failed input does not also destroy the route.
Risk
Testing jump timing and a new trick together hides whether the launch or the follow-up caused the reset.
Controller binding · Controls
Lane switch input
Use the left stick to move between lanes before a traffic or obstacle read.
- All platforms
- Left Stick
- Use it for
- Lane changes, route alignment, and obstacle setup
- Check first
- The target lane and the next visible exit
Player job
Keep a lane change from being mistaken for a landing or camera failure.
Use now
Make one deliberate left-stick lane change on a clear stretch, then repeat it before entering a trick section.
Safe next action
Switch lanes early while the next rail or landing remains visible.
Risk
A late lane change can move the train away from an otherwise correct landing target.
Controller binding · Controls
Trick input
Use the right stick for a single trick input after the takeoff is already stable.
- All platforms
- Right Stick
- Use it for
- Tricks and score extensions
- Bank rule
- Land the short line three times before extending it
Player job
Add style without changing the baseline jump, speed, or landing test.
Use now
Repeat one right-stick direction after a clean jump, then return to the same landing target.
Safe next action
Add one trick direction at a time and keep the exit visible.
Risk
Stacking several stick directions before a route is banked makes the first broken link impossible to identify.
Controller binding · Controls
Honk input
Use the shoulder button when a route or challenge calls for a honk instead of a movement input.
- Xbox
- LB
- PlayStation
- L1
- Switch 2
- SL / L
- Use it for
- Honk objectives and route signaling
Player job
Keep a non-movement objective from consuming the button used for speed or trick control.
Use now
Test the honk once in a safe section, then return to the route without changing the movement profile.
Safe next action
Treat honk as a separate objective input and do not test it during a blind landing.
Risk
A shoulder-button mix-up can trigger the wrong action at the exact point a line needs braking or control.
Controller binding · Controls
Launch boost input
Use the face button for a launch boost only after the approach and exit are readable.
- Xbox
- A
- PlayStation
- Cross
- Switch 2
- B
- Use it for
- Launch boost, race openings, and speed tests
Player job
Separate boost timing from a failed takeoff or an over-speed landing.
Use now
Run the same short approach once without boost, then repeat it with one boost input and compare the exit.
Safe next action
Use boost on a straight, visible section rather than at an unknown landing.
Risk
Extra speed can move the train past a safe exit before the route has been scouted.
Route reading guide · Routes
City line
Use the city line as a route-reading drill before chasing a higher score.
- Examples
- Osaka, Tokyo, and other sealed metros
- Route question
- Can you read rails, traffic, and tight transitions at speed?
- First pass
- Scout before styling
Player job
Identify the movement rule that defines the current route before adding style or speed.
Use now
Can you read rails, traffic, and tight transitions at speed?
Safe next action
Make one low-score scouting pass, keep the next exit visible, and bank the route rule before extending the line.
Risk
Treating every region as the same movement problem can turn an unfamiliar obstacle rhythm into repeated resets.
Route reading guide · Routes
Countryside line
Use the countryside line as a route-reading drill before chasing a higher score.
- Examples
- Kyushu and open rural routes
- Route question
- Where can you preserve momentum across longer approaches?
- First pass
- Scout before styling
Player job
Identify the movement rule that defines the current route before adding style or speed.
Use now
Where can you preserve momentum across longer approaches?
Safe next action
Make one low-score scouting pass, keep the next exit visible, and bank the route rule before extending the line.
Risk
Treating every region as the same movement problem can turn an unfamiliar obstacle rhythm into repeated resets.
Route reading guide · Routes
Terrain challenge
Use the terrain challenge as a route-reading drill before chasing a higher score.
- Examples
- Meadows, volcanoes, oceans, and snowfields
- Route question
- What new takeoff, landing, or visibility rule defines the region?
- First pass
- Scout before styling
Player job
Identify the movement rule that defines the current route before adding style or speed.
Use now
What new takeoff, landing, or visibility rule defines the region?
Safe next action
Make one low-score scouting pass, keep the next exit visible, and bank the route rule before extending the line.
Risk
Treating every region as the same movement problem can turn an unfamiliar obstacle rhythm into repeated resets.
Route reading guide · Routes
Rival route
Use the rival route as a route-reading drill before chasing a higher score.
- Examples
- Reimagined Japanese trains and underground gangs
- Route question
- Is the objective speed, clean completion, or score control?
- First pass
- Scout before styling
Player job
Identify the movement rule that defines the current route before adding style or speed.
Use now
Is the objective speed, clean completion, or score control?
Safe next action
Make one low-score scouting pass, keep the next exit visible, and bank the route rule before extending the line.
Risk
Treating every region as the same movement problem can turn an unfamiliar obstacle rhythm into repeated resets.
Route reading guide · Routes
Boss route
Use the boss route as a route-reading drill before chasing a higher score.
- Examples
- Mechanical worms, moving castles, and stranger machines
- Route question
- Which phase opening lets the movement system solve the fight?
- First pass
- Scout before styling
Player job
Identify the movement rule that defines the current route before adding style or speed.
Use now
Which phase opening lets the movement system solve the fight?
Safe next action
Make one low-score scouting pass, keep the next exit visible, and bank the route rule before extending the line.
Risk
Treating every region as the same movement problem can turn an unfamiliar obstacle rhythm into repeated resets.
Release check · Setup
Post-release baseline pass
Capture the current platform, controller profile, objective, and first stable landing before diagnosing a hard route.
- Record first
- Platform, controller profile, objective, first stable landing
- Comparison
- Same route and camera on the next attempt
- Use when
- A post-release patch or device change makes old practice notes feel inconsistent
Player job
Separate a launch-build setup problem from a movement problem.
Use now
Run one short line with the current controller profile, record the objective, and stop at the first repeatable landing or reset.
Safe next action
Keep the same device, camera, and route for the comparison attempt.
Risk
A platform or input change made at the same time as a new trick creates a false improvement and cannot be repeated.
Race recovery · Race
Race checkpoint reset
Use the last clean checkpoint as the comparison point instead of replaying a full score line after every loss.
- Baseline
- Last clean checkpoint
- First change
- Remove optional style
- Add back
- One speed link that survives the same exit
Player job
Find the section that actually costs the rival race.
Use now
Remove optional tricks, repeat the section from its last clean checkpoint, and add speed only after the slow handoff is visible.
Safe next action
Bank a clean checkpoint time before testing a boost or longer grind.
Risk
Chasing score during a race retry can hide the one slow section and spend the next landing before it is readable.
Boss recovery · Boss
Boss return route
Treat the return to the boss as a survival route first, then restore the style or damage link that the phase actually allows.
- First pass
- Survival and phase cue
- One punish
- Use the shortest recovery-safe opening
- Extend when
- The return route repeats without a blind reset
Player job
Reach the next boss phase with one readable exit still available.
Use now
Scout the approach without optional style, mark the first phase cue, and choose one safe punish before adding a combo.
Safe next action
Keep the phase exit visible and use the same approach on the comparison attempt.
Risk
A flashy damage line can make a phase appear solved while the return route remains too fragile to repeat.
Control recovery · Controls
Rebind after a device change
Reconfirm one movement input in open space before carrying an old timing assumption onto a new pad or platform.
- Test order
- Jump → lane switch → one trick
- Comparison
- Previous profile on the same short section
- Return to route
- Only after the simple actions are consistent
Player job
Tell a binding mismatch from a genuine execution failure.
Use now
Test jump, lane switch, and one trick separately, then restore the route only after each input produces the expected action.
Safe next action
Use a short open section and keep the previous profile available for comparison.
Risk
Changing the binding and the route together makes the next miss impossible to classify.
Post-release progression · Score
Platinum medal route
The August 20 Platinum Update adds Platinum Medals as a completion layer, so a route can now be stable enough to clear while still needing a tighter score or landing plan.
- Current update
- Platinum Update · Aug 20, 2026
- First pass
- Clear the route without optional style
- Medal pass
- Add one measurable score link
Player job
Convert a repeatable clear into one controlled Platinum attempt without changing the whole route.
Use now
Bank the clean route first, then add one score link at the section that costs the medal. Keep the landing and next exit visible before extending the line.
Safe next action
Use the same train, camera, and checkpoint for the comparison attempt; remove the extra link if the clear itself becomes unreliable.
Risk
Chasing Platinum from an unbanked route mixes score pressure with basic movement errors and makes the real medal blocker impossible to identify.
Post-release progression · Route
Cutscene selector and train unlock
The current 1.3.0.1g patch adds a Cutscene Selector on the World Map and an unlockable train for completing all Platinum Medals.
- Current patch
- 1.3.0.1g · Aug 20, 2026
- Replay tool
- Cutscene Selector on the World Map
- Completion reward
- Unlockable train after all Platinum Medals
Player job
Separate replay or completion cleanup from the first clear so a collectible or cutscene goal does not distort the movement baseline.
Use now
Finish the current route, confirm the Platinum record, then use the World Map Cutscene Selector for replay cleanup; treat the train unlock as a completion reward rather than an early build requirement.
Safe next action
Record which medal or scene is missing before replaying the whole campaign, and keep one known-good movement line unchanged.
Risk
Assuming the unlock is tied to a single stage or a normal clear can send the player into repeated score attempts without checking the full Platinum requirement.
No matching Denshattack drill
Try takeoff, landing, grind, score, race, boss, route, controls, or remove one filter.
When the answer does not fit
Recover when every attempt fails at a different point
Return to the shortest route that exposes one cause and one measurable result.
- 1Remove optional style
Run the objective with the smallest trick and grind commitment that still reaches the next section.
- 2Mark the first failure
Ignore the later reset and record the earliest takeoff, landing, speed, route, boss, or input problem.
- 3Repeat the same drill
Keep the camera, controller profile, and entry approach stable while testing that one link.
- 4Add one extension
Restore one trick or transition only after the clean route repeats.
Decision table
Choose the next drill from the objective that failed
Choose the row that matches the failure in front of you; the action is a bounded next experiment, not a hidden-stat guarantee.
| Situation | Action | Why |
|---|---|---|
| The route clears but the score is low | Add one link | The stable line remains a comparison baseline. |
| The score is high but the landing fails | Shorten the combo | An unbanked score does not complete the route. |
| A rival keeps winning | Remove style and find the slow section | Speed loss and score loss are different problems. |
| A boss phase is unreadable | Use a low-risk survival line | Learning the phase creates the next real damage window. |
Share this guide
Send the answer when another player hits the same blocker.
Share the current Denshattack route, or copy the link for Discord and group chat.
Player questions
Controls & Tricks FAQ
Use the current game panel before spending rare resources on a value that can change.
How do you build a reliable combo?
Choose the landing first, repeat the shortest line until it works three times, then add one trick or grind link.
Why does a high-score line keep failing?
The takeoff, grind exit, landing, or final risky link may be unstable. Keep the successful base line and change only the first failing part.
Should you use tricks in a rival race?
Use only the tricks that preserve speed until the slow section is identified. A race and a score route solve different problems.
Does this include exact boss timings?
No. It provides a survival-first phase drill without inventing current frame windows or universal boss routes.